I needed to find a way to improve my Glock Trigger without spending hundreds of dollars on a new trigger. Here’s what I did that worked.
You can improve a Glock trigger pull by polishing the friction points on the trigger bar. Keeping the trigger assembly clean and well lubricated will also significantly improve the trigger pull of a Glock.
I’ll go in depth into the simple process to clean, polish, and lubricate the trigger system on a Glock. It’s easy if you follow these steps.
How to Upgrade a Glock Trigger in 5-10 Minutes at Home
Begin by disassembling your Glock. You’re going to need to field strip the weapon, then remove the trigger system. Once removed, we will use a Dremel tool in the lowest setting to polish all the metal contact points of the trigger bar. It can be done by hand with Q-tips, but it takes a while.
To remove the trigger system, first field strip the gun. When the upper is removed from the lower frame, remove the three pins in the lower frame, two near the trigger, and one in the rear of the handle. Use a punch or a small nail to push out the pins. Sometimes they need a tap to get them moving.
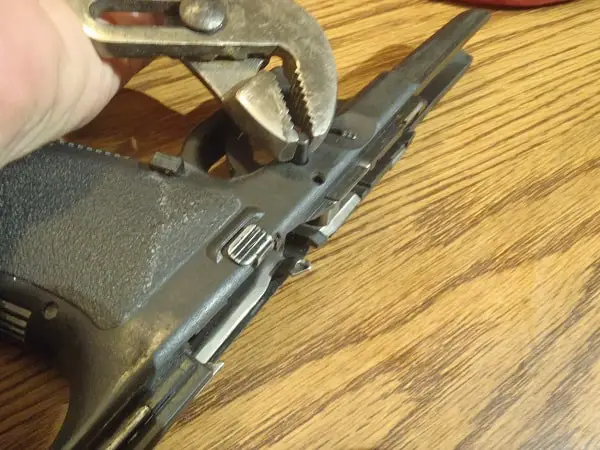
The wider pin, the lower one near the trigger, sometimes gets stuck. If that’s the case, wiggle the slide released a bit then try again. The slide release is under spring pressure and tends to lock that pin in place. If it still isn’t coming out, wiggle the slide release while pushing on the pin.
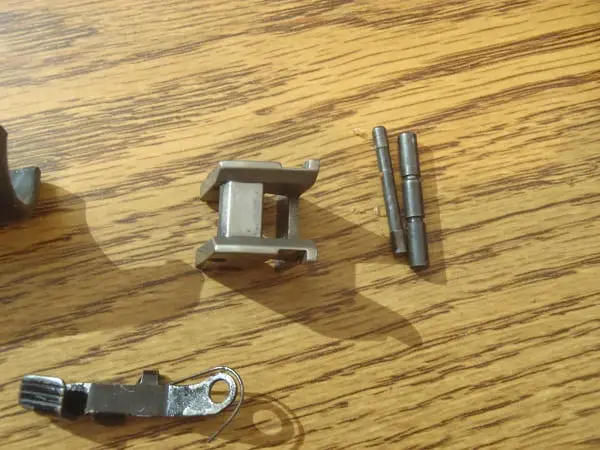
The first part to pull out is the slide release. It’s now completely loose, so pull it out and set it aside. If you don’t take it out first, it will fling across the table. that’s what mine just did.
Next up is the little metal saddle towards the front. That part hold blocks the trigger from coming out. Pry it lightly and it will come right out.

Now we’ve field stripped the gun, and removed two pins, the slide release, and the metal saddle. Here’s all the small parts remkved so far.
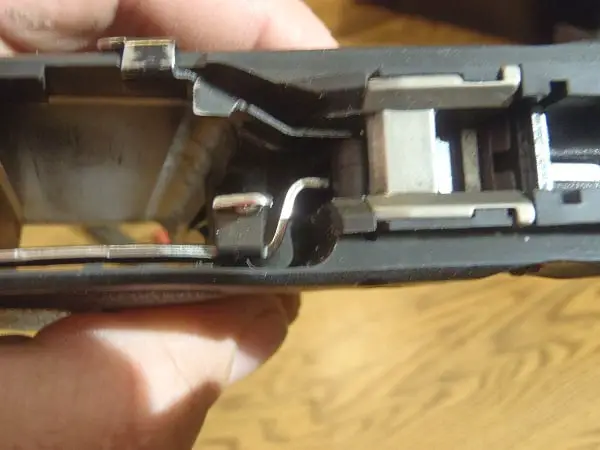
Next, you need to grab the ridgepiece sticking up in the back. Give it a tug and the whole trigger system should come right out of the pistol frame. The whole thing is a fairly simple apparatus. Don’t worry about getting it back together, it will be easy.
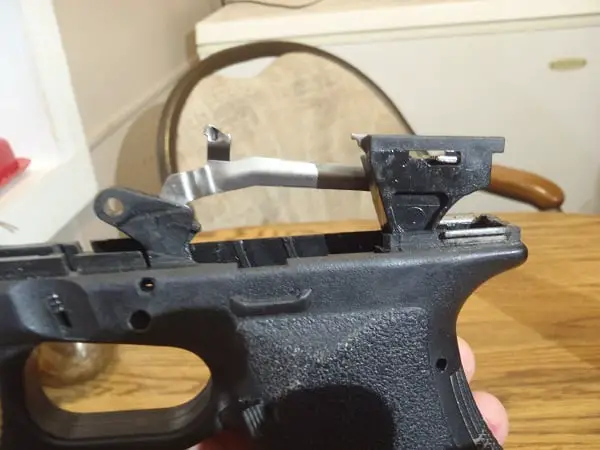
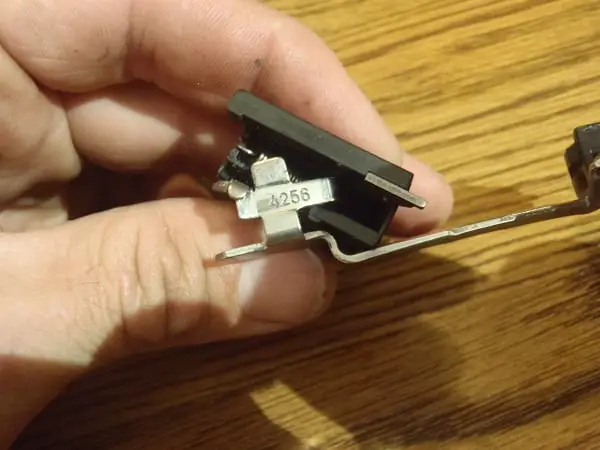
So, now you have removed the trigger, trigger bar, and the rear housing piece; all in one. Next, we have to separate those parts. That’s actually pretty easy too. The trigger bar is the only piece that needs to be polished, mainly the rear of it. So, we gotta get to it.
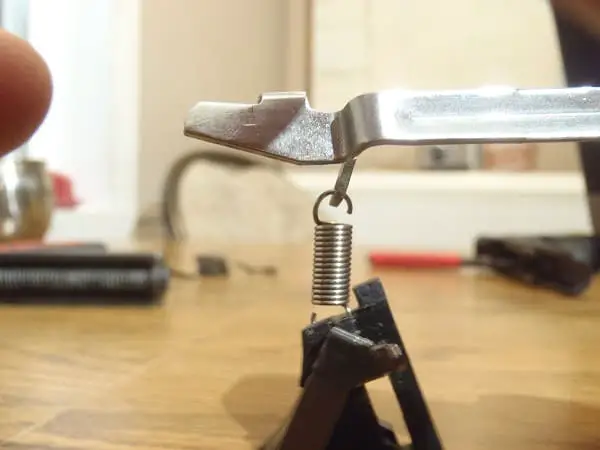
To remove the trigger bar from the rear housing, you need to pull it forward as far as it goes, and turn it out, away from the housing. Watch closely so that you don’t over extend the spring. With a little wiggling, the trigger bar will pop out of the housing, thou still connected to the spring.
You do want to be careful that you don’t damage the spring. It’s only a buck or two to buy a new one, but it’s still a hassle to have to order a new part. Just keep a keen eye on things and there will be no problem. When it’s out, simply unhook the spring from the trigger bar and you are ready for the fun part.
Polishing a Glock Trigger
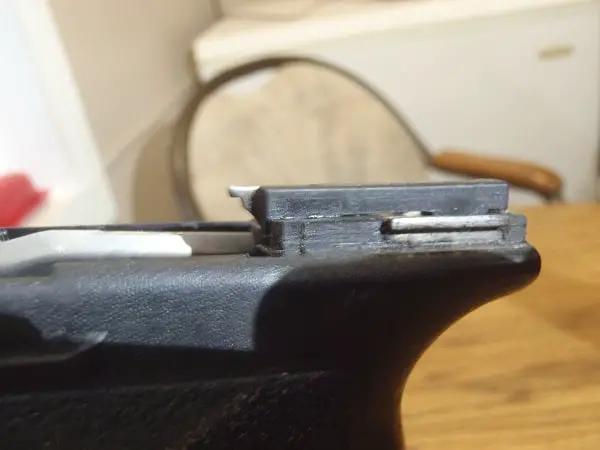
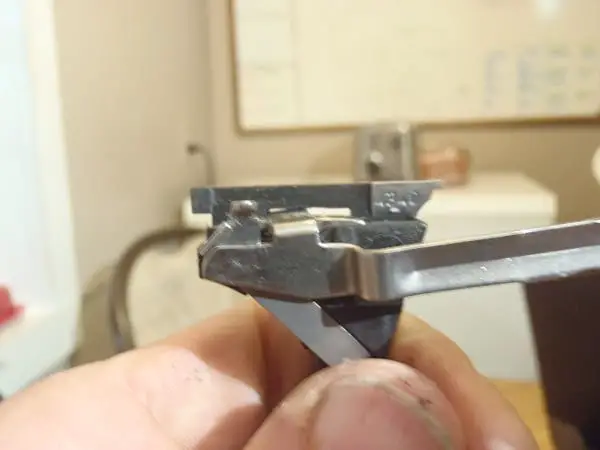
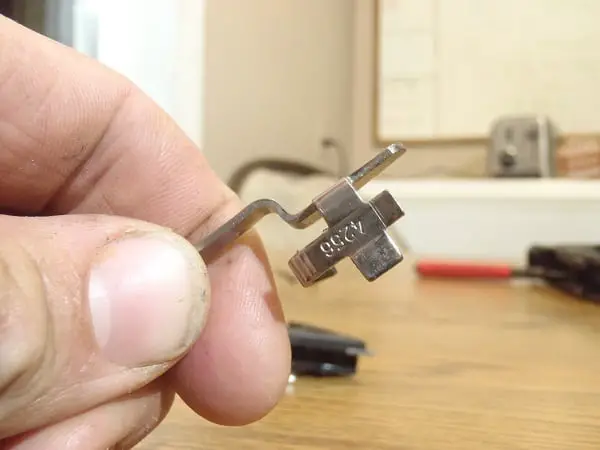
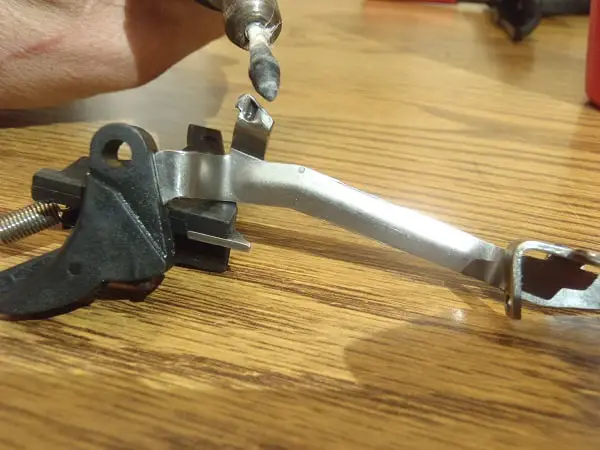
On the back of the trigger bar there is a little cross shape. The cross is where most of the polishing needs to be done. the bottom and edges need to be polished as good as you can get it. You should polish to a decent mirror finish for the best results.
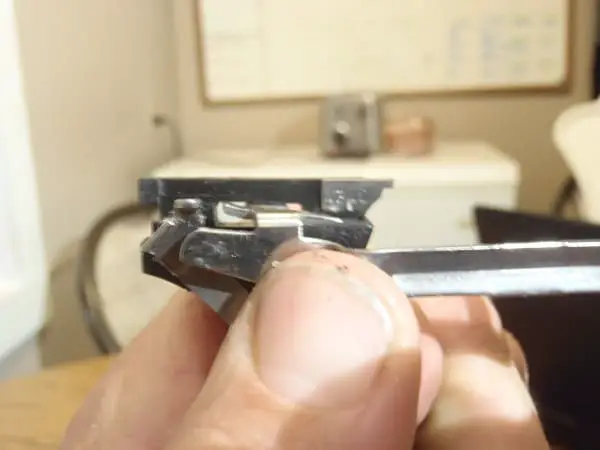
There is one more spot I like to polish. The top and front edge of the arm that sticks out from the front of the trigger bar. The nub on the end of the arm is part of the safety system. As the trigger is pulled, it pushed a large pin up which opens the firing pin channel.
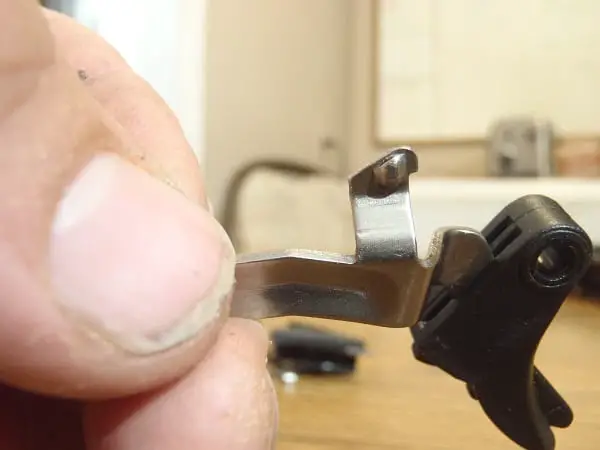
Every time the trigger is pulled, the nub on the trigger bar is pulled across the round pin in the slide assembly. By polishing it too, we can further improve the feel of the trigger pull.
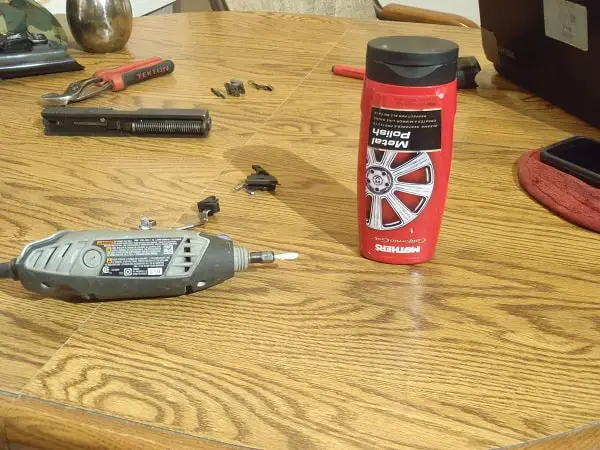
To polish things, you should use a dremmel. It only takes a minute or two with one. Most Glock Owners use a cotton polishing wheel with a buffing compound. You can use a cotton polishing wheel to polish the spots, or you can use a Q-tip in the dremmel.
That’s what I use, mainly because I lost all my buffing wheels. I take a Q-tip, cut it in half, and stick it in my dremmel. As long as you don’t push hard, it works swell. You’re not supposed to push hard anyway. When you are polishing it, take it easy. Don’t force it, let it work.
`some folks worry about removing too much metal and damaging part of their gun. Polish it, don’t grind it. when doing a trigger job, there is usually concern of going too deep and getting into soft metal. With triggers such as the AR-15, the hammer is case hardened.
That means only the outside of the hammer is hardened to specs. If you go too deep, the metal will be soft and will quickly develop burs and wear unevenly. Fortunately, that’s not the case on a Glock. But anyway, with polishing compound, it would be verry hard to remove so much as to cause a problem.
Just buff it so a bright luster. Any decent metal polish will do the job just fine. I’ve used both paste and liquid polishing compounds. They will both work fine. If you don’t have a metal polish, every auto store has several. You can just go with the cheapest one. Be sure it says “polish” and not “wax”.
Cleaning the Polish off of the Glock Trigger Parts.
Now the fun part is done. you should have a nice shiny, lustrous finish on the polished parts. You now need to wash it off really good. The polish contains both a wax, and fine abrasive material. Both of which are bad for the trigger. It needs to be cleaned well before you put it back together.
The best cleaner is old fashioned hot, soapy water. Simmer up some water, dump it in the dish sink, and add some dish soap. Extra soap won’t hurt. Let the trigger bar and trigger sit briefly in the water, then scrub it with a tooth brush or other fine brush. It only takes a minute.
Rinse that puppy well in plenty of hot water. Rinse extra around the trigger to flush out any grit or dust that may be in the crevices. Be sure that the slot where the trigger bar goes into the trigger is super clean and debris free. that will go a long way to keeping your trigger in its best condition.
As soon as it’s completely dry, you can re assemble things. I like to blow hard into the crevices to displace any remaining water drops. If it isn’t completely dry, it won’t lubricate well.
Reassembling and Lubricating the Polished Glock Trigger
First, reconnect the little spring to the rear of the trigger bar. Remember, be careful with it. next, start lining the trigger bar and the rear housing, then pop it back in place. Take your time here if you need to don’t force anything. If it’s not going, just keep wiggling it. just don’t over extend the spring.
Now that the trigger system is put back together, lower it back into the pistol frame. The trigger needs to be positioned into the trigger slot as you are lowering it. the trigger and the rear housing should go into place together. Push it firmly in place, then put the pins back in.
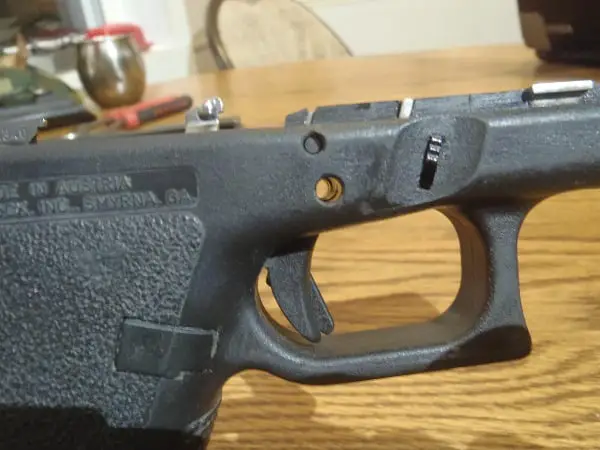
Put the shorter pin back in the handle first. Now that things are held in place, put the saddle piece back in place. As soon as it’s in, insert the top pin to hold it there. If you put the bottom pin in first, it’s tricky to align the slide release spring. Put the top pin in first.
Now, reposition the slide release just on the left side of the trigger. Push the slide release in until the tab on the release lines up with the notch in the frame. Insert the last pin, wiggling the slide to line it up so the pin will go through it.
Before you put the slide back on, now is a great time to lubricate the trigger. I recommend two lubricants for the trigger parts. One is a bit expensive the other is cheap and you probably already have it. I use either Molybdenum grease, or Lemon Pledge.
Both are very clean and slick as a whistle. The Pledge actually helps to repel dust and grit. Plus, it dries leaving behind a nice layer of polymers and silicon. Use either, and reapply as needed. Drip or spray a tad on the cross, and the nub that were polished.
Also, lubricate where the trigger bar goes into the trigger and the sides of the trigger itself. Work the trigger back and forth a few dozen times to make sure it’s in there good.
The last thing is to make sure the guide rod (on the slide with a big spring around it) is still in its proper place. Then just slide the frame back on and you’re done, pal!